How to Format an External Drive for Mac Compatibility
This is a simple procedure and is achieved the same way for all drive types and through all connections, be they USB, Firewire, or Thunderbolt. Formatting a drive will erase all data and partitions on the disk:
- Connect the hard drive or USB key to the Mac
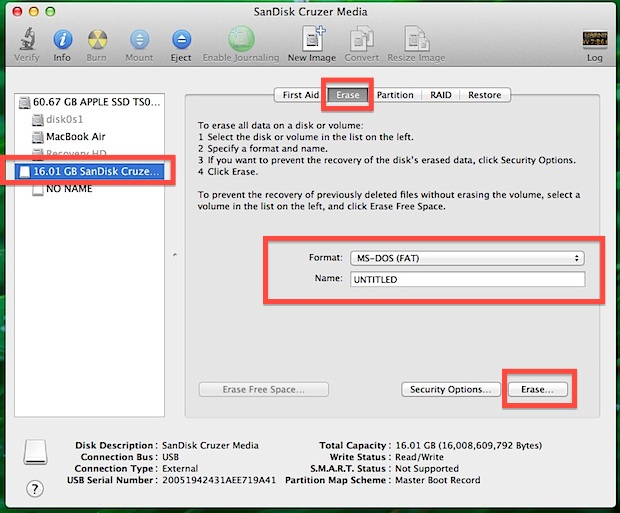
- Launch Disk Utility, located in Applications > Utilities
- Locate the drive name from the left hand side of Disk Utility and click on it
- Click on the “Erase” tab across the top
- Next to “Format:” click the contextual menu and select “Mac OS Extended (Journaled)”
- Name the drive if you want, the name can be changed at any point
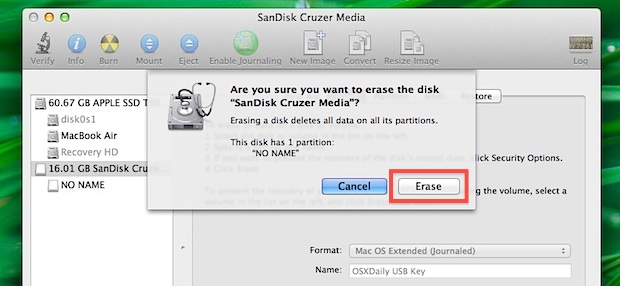
- Click the “Erase” button and confirm again on the next pop-up window


That’s all there is to it, the drive will now format and erase everything on it.
Smaller external hard drives, SSD’s, and USB flash keys format quickly, while a larger hard drive may take a while longer. When completed, the drive will be formatted to the Mac OS X compatible HFS+ filesystem.
The videos below demonstrate the complete process of formatting an external hard drive for full Mac OS X compatibility, this uses the new Disk Utility in modern versions of OS X:
Similarly, you can perform the same type of process in OS X for making a USB flash drive compatible with Mac OS using the Disk Utility in OS X, as you can see, it’s a quick procedure that is done in short order on any Mac:
Should you intend to make an OS X installer drive or create any other bootable Mac OS X volume from a drive, or use a new drive as a fully compatible Time Machine backup drive, you will also need to complete this process.

No comments:
Post a Comment