Migration provides an opportunity to revisit an existing Objective-C app and improve its architecture, logic, and performance by replacing pieces of it in with Swift. Apple has provided interoperability between Objective-C and Swift, so you won’t need to migrate everything at once. You’ll be using Swiftify (in particular, the Swiftify Xcode & Finder Extension) for a straightforward, incremental migration of an app.
Swiftify simplifies the process of translating the syntax from Objective-C to Swift. Interoperability makes it possible to integrate the converted code back into the Objective-C project without any hassle. This means that you can use Swiftify to explore Swift’s extensive functionality one piece at a time, and then integrate it back into your Objective-C project without having to rewrite the entire app in Swift at once.
Update: Swiftify’s new Advanced Project Converter streamlines the process of Objective-C to Swift code conversion. If you’re part of the Swiftify Unlimitedplan, give it a try!
Preparing Your Objective-C Code for Migration
Before converting Objective-C to Swift, it’s best to start off with the most modern Objective-C code possible. Xcode provides a modern Objective-C converter that can assist you during the modernization process.
Xcode’s modern Objective-C converter can help with the following:
- Changing
idtoinstancetypewhere appropriate - Using the correct enum macros
- Updating to the more modern
@propertysyntax
Although the converter helps with the mechanics of identifying and applying potential modernizations, it doesn’t interpret the semantics of your code. For example, it won’t detect that your
-toggle method is an action that affects your object’s state, and it will erroneously offer to modernize this action to make it a property. Make sure to manually review and confirm any changes the converter offers to make to your code.
To use the modern Objective-C converter, choose Edit → Refactor → Convert to Modern Objective-C Syntax.
The Migration Process
The most effective approach for migrating code to Swift is on a per-file basis — that is, one class at a time. Because you can’t subclass Swift classes in Objective-C, it’s best to choose a class in your app that doesn’t have any subclasses. You’ll replace the .m and .h files for that class with a single .swiftfile. Everything from your interface and implementation goes directly into this single Swift file. You won’t create a header file. Xcode generates a header automatically in case you need to reference it.
Creating a Bridging Header File
When adding your first .swift file to the project, you’ll likely be hit with a prompt that looks like this:
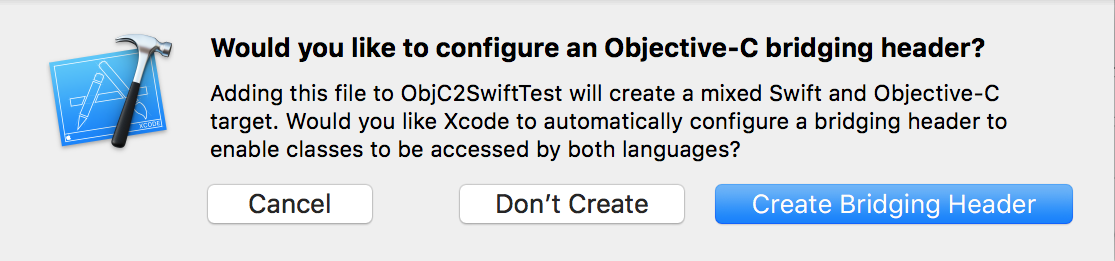
Click Create Bridging Header.
If you did not see the prompt, or accidentally deleted your bridging header, add a new .h file to your project and name it [MyProject]-Bridging-Header.h, then make sure you link its path in your target’s project settings like so:
Do I need to convert the entire project?
Don’t feel obligated to convert all your code to Swift. There may be pieces of code that you want to leave in Objective-C, and there’s nothing wrong with that.
For more information, please take a look at our post, Should I Convert Everything to Swift?.
A step-by-step approach
- Pick a pair of .h and .m files to be converted into Swift (i.e. MyViewController.h and MyViewController.m). If your goal is to convert the entire project to Swift, leave the AppDelegate class for last.
- Search for
#import “MyViewController.h”through your whole project - Remove
#import “MyViewController.h”from the Obj-C Bridging Header File ([MyProject]-Bridging-Header.h). - In all .m files: Replace instances of
#import “MyViewController.h“with#import “[MyProject]-Swift.h“to import your Swift umbrella header instead. - In all .h files: Replace
#import “MyViewController.h“with a forward class declaration:@class MyViewController. This helps to avoid circular references between header files. - Convert the pair of Objective-C files to Swift. The Finder extension included in Swiftify for Xcode is the easiest way to do that. Alternatively, copy contents of both .h and .m files to a .swift file and use the “Convert File to Swift” command in the Swiftify Xcode Extension.
- Remove .h and .m files from the project, and add the converted .swift file instead.
- Try to compile the project, and fix any conversion errors. Many issues can be fixed by following Xcode auto-fix suggestions. The Editor → Fix All in Scope command is especially helpful here. If you see any error that occurs a lot to your project, feel free to report the issue to Swiftify.
- Build and run the project. If the runtime complains that it can’t find this class (this is usually accompanied by crashing), find all references to it in the Storyboard (or XIB) editor and reenter the class name in the Identity Inspector. Save and try again.
If you’re converting the entire project
When all of the other files have been converted, convert the AppDelegate class. At this point, if there are no Objective-C files left in the target, you can delete the main.m file and the .pch (precompiled header) file.
How has your experience been moving to Swift?
Is there any part of the conversion that you found difficult?
Related articles
Related articles
The following articles may be very helpful for your project migration:
https://developer.apple.com/library/content/documentation/Swift/Conceptual/BuildingCocoaApps/Migration.html
https://developer.apple.com/library/content/documentation/Swift/Conceptual/BuildingCocoaApps/Migration.html
https://www.oreilly.com/ideas/translating-your-objective-c-project-to-swifthttps://www.slideshare.net/DominiqueStranz/migrating-from-objectivec-to-swift-74054759
Additionally, here is a very good description for using the Bridging Header filefor interoperability between Objective-C and Swift code.