I have found that there are quite a few postings out there about how to use custom fonts in your application. It is unfortunate that I didn’t find a single one that actually helped me use a custom font. Most of them echoed each other and gave misleading or erroneous advice. Because of this I am going to post how to actually use a custom font in your app.
First, you must be aware that custom fonts are added on a per-application basis. You can not add a font to your iOS device and have it be available for all of your applications.
Second, no code needs to be added in order for you to use the custom font or fonts in a QuickConnectFamily hybrid iOS application or any other application that uses the UIWebView.
Third, no @font-face CSS call is needed in your application.
Fourth, this example will show two custom fonts being added and used. The first is the Freshman font, the second is the PF Handbook Pro Normal font. Both of these are available as ttf files.
OK. So here is how we do it.
- Drag your ttf files into the Resources group of your project selecting the copy checkbox.
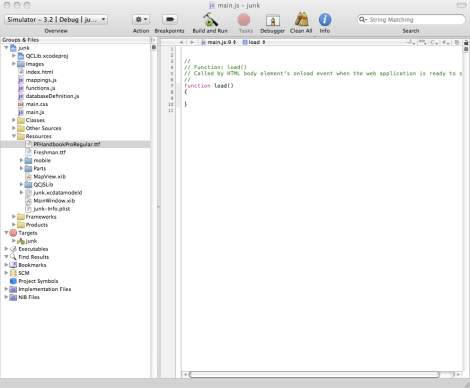
- Open your applications’ info.plist found in the Resources group.

- Control-click on any of the properties and select New
- Select ‘fonts provided by application’
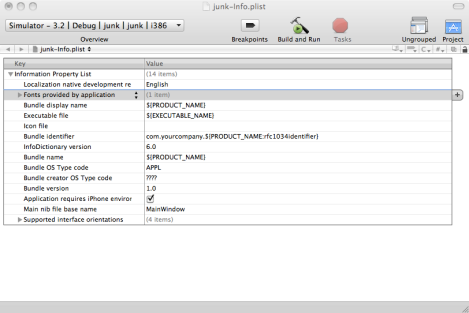
- Expand the resource just created by clicking the triangle button on the left of the description

- Enter Freshman.ttf in the Value column (You would put the name of your font file here)
- Control-click the Freshman.ttf row and select Add Row
- Enter PFHandbookProRegular.ttf in the Value column(You would put the name of another font you want to use here)

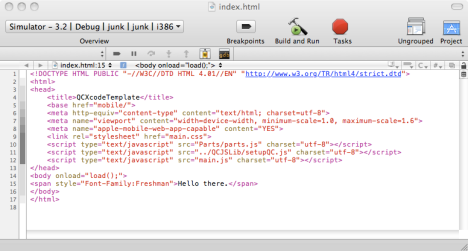
- Use the font in your CSS or directly in an inline style. Both now work.
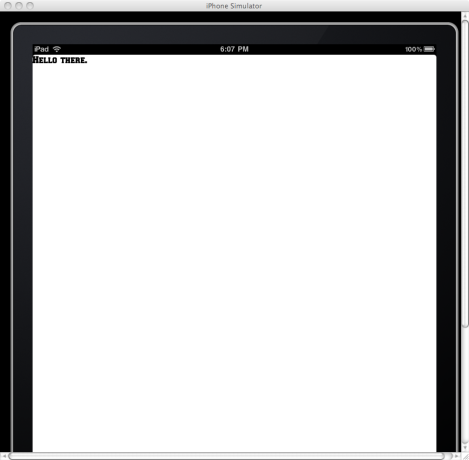
Hopefully this will clear things up regarding using custom fonts.

No comments:
Post a Comment